
Last updated November 18, 2026
 Hardwood
 Engineered hardwood
 Luxury vinyl plank
 Laminate
 Porcelain tile
 Carpet
 Shaw
 Mohawk
 COREtec
 Pergo
Free in-home measure and written estimate: Shaw, Mohawk, COREtec and Pergo lines compared on your own rooms, with carpet, tile, vinyl plank, laminate and hardwood laid out side by side
Get your free estimateSubfloors Explained: What Sits Under Your New Floor
Most flooring failures we’re asked to look at have nothing to do with the floor itself. The plank delaminates at a seam, tile cracks along a hairline, a floating floor starts to click and rock at the edges. The product performed exactly as designed. What gave way was the surface underneath, which nobody measured, nobody documented, and nobody corrected before the first board went down. The subfloor is the biggest variable in whether a new floor performs the way its maker intended, and it’s also the one part of the job you’ll never see once the install is finished. This guide breaks down what sits under your floor in Sunrise Manor, how it gets checked, what correcting it involves, and what you’re paying for when a contractor tells you the concrete needs work before the floor can go down.
Quick Answer
The subfloor is the structural surface beneath your finished floor, and in Sunrise Manor it’s usually a concrete slab, plywood over joists, or an existing tile floor being used as a substrate. Its condition decides whether your new floor hits the flatness and moisture requirements the manufacturer sets. If the subfloor isn’t flat and dry enough, even a well-made floor will fail early, no matter how carefully it’s installed. Correcting it is part of the installation job, and it’s quoted before work starts, not discovered halfway through.
Styles & brands we work with
- Hardwood
- Engineered hardwood
- Luxury vinyl plank
- Laminate
- Porcelain tile
- Carpet
- Shaw
- Mohawk
- COREtec
- Pergo
Table of Contents
- The Three Subfloor Types You’ll Find in Sunrise Manor Homes
- What Flatness Tolerance Actually Means
- Moisture Vapor Emission: The Invisible Problem Under Concrete
- Installing Over Existing Tile: When It Works and When It Doesn’t
- Floating Floors vs. Glue-Down: Two Very Different Subfloor Demands
- How We Test a Subfloor Before Installation
- What Subfloor Correction Adds to a Flooring Project
The Three Subfloor Types You’ll Find in Sunrise Manor Homes
Nearly every home we walk into in Sunrise Manor falls into one of three subfloor categories, and each one changes what floor you can put on top and how the install has to be handled. Knowing which one you have is the first real step in choosing a floor that fits the house.
Concrete slab
Most single-story homes and a large share of two-story builds in the valley sit on a concrete slab poured directly on grade. The slab is solid and stable, which is good. But it’s also in direct contact with the ground, which means it transmits moisture vapor from below into the house. Every slab is a moisture source, and the question is never whether vapor is reaching the surface but how much. That’s why a slab floor has to be tested before a moisture-sensitive product like hardwood or laminate goes down, and why glue-down installations need an adhesive rated for slab work. A slab also tends to carry small undulations from the pour, and a gentle rise or dip that looks flat to the eye can be well outside tolerance over a ten-foot span.
Plywood over joists
Second floors and some older builds use a wood subfloor: sheets of plywood or oriented strand board nailed to joists above a crawlspace or a lower level. This type of subfloor is generally dryer than a slab on the surface, but it has its own issues. Joists deflect under load, so the floor can feel or measure slightly out of flat. Panels can have gaps, delaminate, or squeak where fasteners have loosened. And in a dry climate, wood moves. When a new floor is going down over plywood, the material’s own thickness and condition matter, not just how flat it feels underfoot.
Existing tile used as a substrate
Plenty of Sunrise Manor homes already have a tile floor, and homeowners often want to know whether the new flooring can simply go over it. Sometimes the answer is yes. Often it isn’t. What matters is how soundly the tile is bonded, how flat the surface is, how much height the new floor plus tile will add to a doorway or a transition, and whether cracks in the existing tile are likely to transfer through to the new floor. We cover that in its own section below, because it’s the scenario where the biggest and most expensive surprises tend to happen.
Whichever category your home is in, the subfloor type has to be confirmed before the material is chosen. A product that’s fine over a sound concrete slab may be a poor fit over a wood subfloor with deflection, and vice versa.
What Flatness Tolerance Actually Means
Flatness tolerance is the amount the subfloor is allowed to deviate from a true plane over a set distance, and the standard figure in the flooring trade is 3/16 inch over a 10-foot span. That measurement is what most manufacturers specify before their product can be installed. It sounds fussy and precise. It is. But the number matters because every product has its own tolerance, and exceeding it is one of the main reasons a new floor fails.
How flatness gets measured
Flatness is not checked with a level on a two-foot section. It’s checked over a long run. A technician lays a straightedge, typically 10 feet long, across the subfloor in several directions, then measures the gap underneath at the low points. A ten-foot straightedge used on a floor with a gentle dip in the middle will reveal that dip clearly. A short level laid on the same floor might show nothing. This is one of the reasons a proper check takes time and a large tool, and why a “looks flat to me” install routinely runs into trouble.
- Clear the room and check the subfloor for debris, nails, or adhesive residue.
- Sweep the entire surface and mark any obvious cracks, seams, or high spots.
- Lay a 10-foot straightedge in multiple directions across the room.
- Measure the gap under the straightedge at each low point.
- Record where the floor measures beyond the product’s stated tolerance.
- Plan leveling compound or another correction where it’s needed.
Correcting a floor that’s out of tolerance
Modest out-of-flat conditions on a concrete slab are usually corrected with a self-leveling compound poured into the low spots, or with a skim coat over the entire area. On a wood subfloor, correction might mean screeding the joists, adding a layer of plywood, or using a patching compound. What’s not an option is skipping the correction and letting the floor absorb the difference. A floor that’s forced flat over a hump will rock, click, or delaminate over time, and the cost of fixing it later is far higher than the cost of leveling compound up front. The product instructions and the written estimate set the specifics for your floor and your room.
Moisture Vapor Emission: The Invisible Problem Under Concrete
Moisture vapor emission is water vapor rising through a concrete slab from the ground underneath, and in a valley climate it’s the most common invisible cause of floor failure we see in Sunrise Manor. It doesn’t announce itself. The slab looks and feels dry. There’s no puddle, no drip, no obvious sign. Then six months in, a laminate floor starts to cup and lift at the edges, or a hardwood plank develops gaps, or a glue-down vinyl starts to lift. The material didn’t fail. It absorbed moisture the subfloor was releasing the whole time.
How vapor emission gets tested
Testing is done in one of a few standard ways, and which one gets used depends on the floor going in. A calcium chloride test places a dish of moisture-absorbing material on the slab under a sealed dome and measures how much vapor the slab gives off over a set period. An in-situ relative humidity probe is drilled into the slab and left to equilibrate, then read with a meter. Either method produces a number in the units the manufacturer’s installation instructions specify. The exact thresholds vary by product and by material category, so we don’t quote a single universal figure. What matters is that testing happens and the result is matched against the product’s own requirements before installation begins.
- Why the climate matters: Valley summers are hot and dry on the surface, which can make a slab look and feel completely dry while vapor is still moving through it.
- Why the product matters: Hardwood and laminate have tighter moisture tolerances than many tile installations. A floor that would be fine over the same slab with one material can fail catastrophically with another.
- Why testing matters: No test means no documented baseline. If a floor fails, there’s no record to show the slab was within tolerance at the time of install, or to show it wasn’t.
What mitigation looks like
If a slab tests higher than the product allows, the fix is a moisture control layer between the slab and the new floor. That can be a roll-on vapor barrier, a sheet vapor retarder, or a combination of underlayment and barrier specific to the product. Some high-performance vinyl planks, like COREtec and LifeProof, are engineered with water-resistant core construction that allows some tolerance for moisture, which is one reason they’re popular for slab-on-grade rooms. That doesn’t mean any slab is fine without testing. Water-resistant is not waterproof, and moisture from below still has to be managed. The underlayment and testing requirements live in the product installation instructions, and those, plus the written estimate, set what’s actually specified for your room.
Installing Over Existing Tile: When It Works and When It Doesn’t
Installing over existing tile can work, and it can be a mistake, and the difference usually comes down to three things: height, adhesion, and crack transfer. This is the subfloor question that most often separates a smooth installation from a project that runs over budget, so it’s worth understanding before you sign anything.
The three things to check
Height. Adding a new floor on top of existing tile raises the finished floor height. The extra thickness matters at doorways, transitions, baseboards, and around built-in features. In a Sunrise Manor home with a standard door swing and a modest clearance under the trim, adding plank plus tile can put a new floor above the threshold. That’s manageable but it has to be planned, and it often involves adjusting the door or the transition strip. If the height gain causes the floor to rise above a shower curb or a step, installing over tile may not be viable.
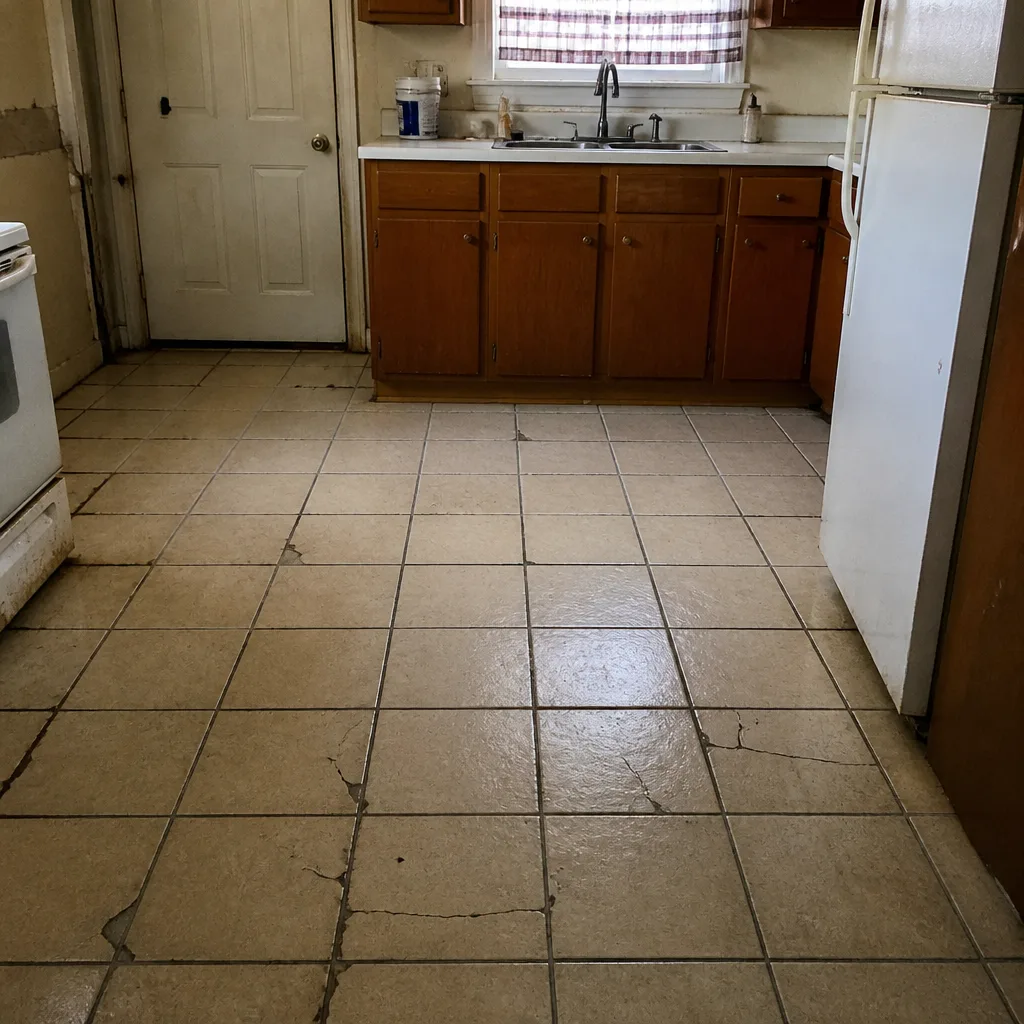
Adhesion. An existing tile floor is a sound substrate only if the tile is soundly bonded. If you tap across the floor and hear hollow spots, or if any tile is loose or cracked, the existing floor can’t carry a new one reliably. Adhesive over a compromised tile surface has nothing solid to grip, and the new floor moves with the old tile the moment it lifts.
Crack transfer. Cracks in the existing tile are a warning sign. They usually mean the substrate below is moving, and cracks in a stiff tile surface tend to transfer up through a new floor laid directly on top. That’s why an uncoupling membrane or a crack-isolation layer is often specified when installing over tile, and why the extra layer has to be factored into the height and cost. A floor that looked fine on the surface can be hiding movement that only shows up in the new material.
When it’s the right call
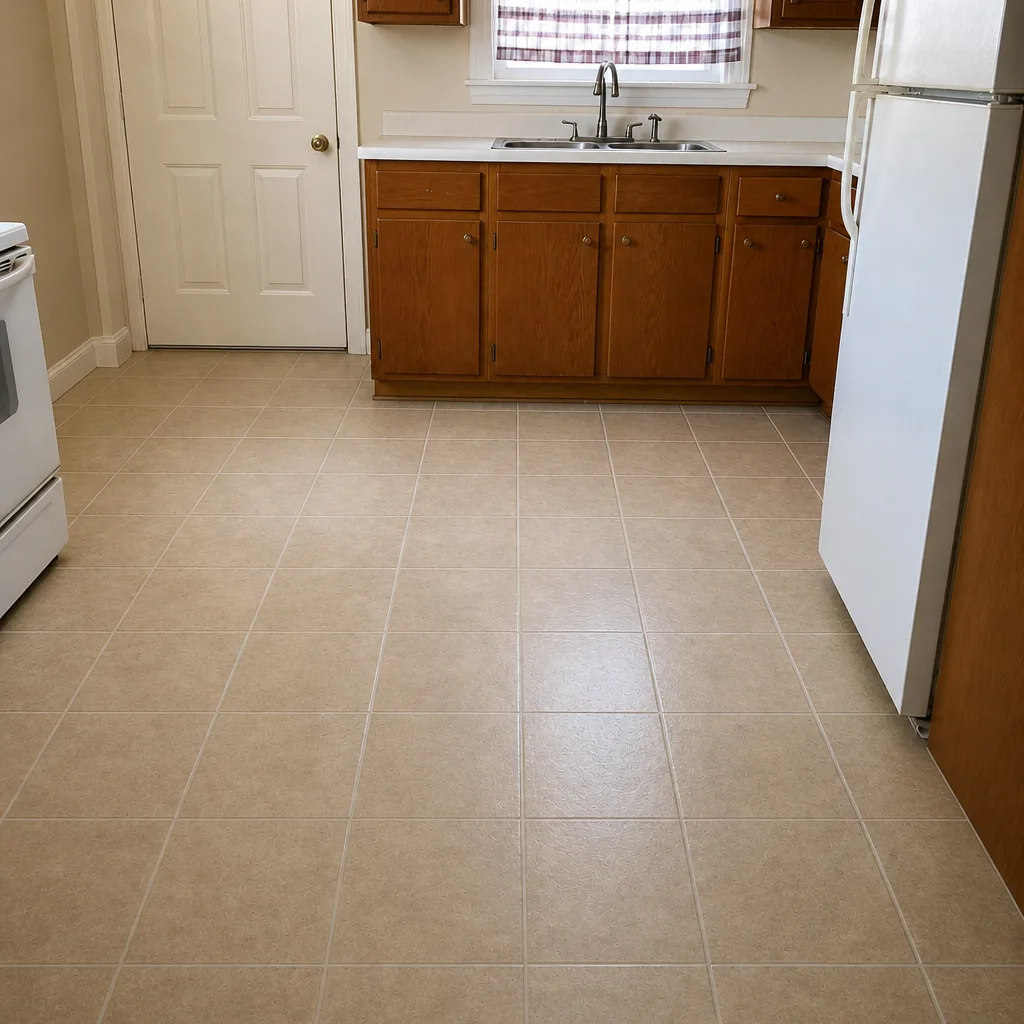
Installing over tile is a reasonable route when the existing tile is fully bonded, there are no cracks or hollow spots, the finished height stays within acceptable limits, and the new floor’s installation instructions allow it. It’s also a faster and often less costly approach than full removal and subfloor repair, which is why it comes up so often. When removal is the better call, it’s usually because one or more of those conditions fails. This decision is made at the estimate visit, not over the phone, because it depends on the specific floor under your specific new floor.
Floating Floors vs. Glue-Down: Two Very Different Subfloor Demands
A floating floor (click-lock planks or tiles that attach to each other and rest on the subfloor without adhesive) and a glue-down floor (planks or tiles bonded directly to the subfloor) are not interchangeable across all subfloor conditions. Each one has a different relationship with the surface underneath, and each one has its own tolerance threshold. Knowing which system is being installed, and why, is a big part of understanding what you’re paying for.
Floating floors
A floating floor sits on an underlayment and relies on the subfloor being flat and structurally sound. Because the planks aren’t glued down, the floor can absorb minor movement without cracking, which is one of its advantages. But the flatness requirement is strict. On an out-of-tolerance subfloor, a floating floor can rock, click, and open at the seams. On a slab with high vapor emission, a poorly selected underlayment can result in cupping or edge lift over time. Floating systems do well when the subfloor is flat and dry, the underlayment matches the product, and the room’s height allows for it.
Glue-down floors
A glue-down floor is bonded directly to the subfloor with adhesive, which locks it in place and generally handles minor movement well, provided the adhesive is specified for that subfloor type and moisture condition. But glue-down installation depends even more on the subfloor being clean, sound, and within moisture tolerance, because the adhesive is in direct contact with the substrate. If a glue-down floor goes over a slab with high vapor emission, the adhesive can lose bond and the floor can lift. The adhesive specification, moisture limits, and surface prep are all in the product instructions, and they bear directly on which system belongs in your room.
The practical takeaway
The same subfloor can call for different correction depending on which system goes on it. A slab that’s borderline for a floating floor might be fine for a glue-down installation with the right adhesive, or it might be the other way around. That’s why the floor selection and the subfloor check have to happen together, and why choosing the floor before the subfloor is measured is putting the cart before the horse. Tile installation has its own set of demands on the subfloor, and we handle that under tile flooring installation for the rooms where a hard surface is the right choice.
How We Test a Subfloor Before Installation
Testing the subfloor is a fixed part of every job we quote, and we do it in a consistent order so nothing gets skipped. The specific tests and the specific numbers depend on the product going in, but the steps are the same on every floor.
- Clear and inspect. We remove the existing floor covering where required, sweep the subfloor, and look for cracks, seams, nails, adhesive residue, and old moisture stains.
- Check flatness. We measure the subfloor with a long straightedge across multiple directions and record any spots outside the target product’s tolerance.
- Test moisture. On a concrete slab, we test for moisture vapor emission using the method the product requires, and record the result.
- Confirm the material. We select the floor based on the readings, not the other way around. A product that fits the subfloor and the room is worth more than a product that looks good in a showroom.
- Plan the correction. Where flattening or moisture control is needed, we write it into the estimate before work starts. No surprises halfway through.
- Confirm the transition. We check door clearances, baseboards, and transitions so the finished height is workable.
By the time you have a written estimate in hand, you should know four things: what kind of subfloor you have, whether it’s within tolerance for the product you’ve chosen, what correction if any is required, and what the plan is for height and transitions. If any of those aren’t clear, ask before you sign.
What Subfloor Correction Adds to a Flooring Project
Subfloor correction is priced by the job and by the condition, and every estimate is free and written. The ranges below are typical for a Sunrise Manor project and are meant to give you a sense of the scale, not a final number. The written estimate sets the actual price.
- Self-leveling compound over a moderate area: typically added as a line item when the subfloor reads out of tolerance. The cost reflects the square footage involved and the amount of material needed.
- Moisture control layer on a slab: a separate line item when the slab reads above the product’s tolerances. The cost depends on the size of the room and the barrier system specified.
- Removal of existing tile as part of the project: when the existing floor isn’t suitable as a substrate, removal and prep are quoted as part of the installation. It’s often less costly than installing over an unsound floor and having it fail.
- Existing tile used as a substrate: when the tile is sound and the height works, this avoids the removal cost and shortens the job.
Hardwood refinishing is a different service from new-floor installation, and doesn’t involve installing over a new subfloor, but existing wood floors still have subfloor conditions underneath that affect the outcome. We quote that work separately as part of our Flooring Installation Sunrise Manor services, along with carpet installation for the rooms where a soft floor is the right fit. If you’re putting new flooring through multiple rooms, or a full house, one flooring specialist handling the whole scope saves you from coordinating between trades, and it’s the kind of project we handle.
Common Mistakes to Avoid
- Skimping on the flatness check. A quick visual check or a short level is not a tolerance check. Use a long straightedge across multiple directions, or ask for the measurement to be done before anything goes down.
- Skipping the moisture test on a slab. A slab that looks dry can release enough vapor to ruin a floor. Testing before installation is the only way to know, and it needs to be part of the estimate.
- Installing over existing tile without checking adhesion and cracks. A tile floor with hollow spots or cracked edges isn’t a sound substrate. Verify it before you let anyone build on top of it.
- Ignoring height gain. New floor over existing tile can push the finished surface above a door threshold or a step. Measure the height before you choose the material.
- Choosing the floor before measuring the subfloor. The right product depends on the subfloor, not the other way around. Get the readings first, then pick the material.
- Letting a contractor skip the correction line. If a quote doesn’t mention subfloor prep and the job clearly needs it, ask why. An estimate that glosses over the correction is usually the one that runs over budget mid-project.
See the difference
 Before
 After
 Before
 After
 Before
 After
When to Call a Professional
Some subfloor questions are worth a call before you buy anything. If you’re considering a new floor over an existing tile surface, if your current floor is cupping, lifting, cracking, or rocking at the seams, if your home is on a concrete slab and been through a Valley summer or two with no moisture test on record, or if you’re finishing a full house and need one specialist to handle carpet, tile, and hardwood refinishing in the same scope, then a site visit will answer more than a phone call can. Flooring Installation Sunrise Manor offers free estimates in Sunrise Manor. We measure the subfloor, test where it matters, and put the findings and the plan in a written quote before anything is scheduled. Our technicians have up to 14 years of experience. Call (855) 799-4650 to schedule your free estimate. We answer 24/7. Fast dispatch from 7am to 7pm, Sunday through Friday.
Frequently Asked Questions
A subfloor is the structural surface underneath your finished flooring, and it’s what the new floor actually attaches to or rests on. It matters because most flooring failures are caused by subfloor conditions (out-of-flat areas, moisture, or an unsound existing floor), not by defects in the floor itself. A properly checked and corrected subfloor is the difference between a floor that lasts and one that starts to fail within a year or two. Call (855) 799-4650 to have yours checked.
It means the subfloor can deviate from a true plane by no more than 3/16 inch over a 10-foot span, which is the standard tolerance most flooring products specify. In practice, a gentle dip in the middle of a room feels minor underfoot but is well outside tolerance when measured with a 10-foot straightedge. A short level won’t catch it. If you have a floor that’s out of tolerance, leveling compound or another correction is typically needed before installation. Call (855) 799-4650 for an exact quote; estimates are free.
Because concrete slabs are in direct contact with the ground and release water vapor into the house, and that vapor can work its way into a floor over time and cause it to cup, lift, or fail even if the slab looked dry. That’s why testing is part of any proper installation over a slab. The acceptable level depends on the product going in, so there’s no single universal number. Testing tells you what the slab is doing and whether moisture control is needed. Call (855) 799-4650 to schedule a free estimate and a subfloor check.
Yes, if the existing tile is soundly bonded, free of cracks and hollow spots, the height gain is acceptable, and the new floor’s installation instructions allow it. When any of those fails (loose tile, cracks, height issues, or a product that won’t accept the substrate), removal is usually the better call. This decision is made at a site visit, not over the phone, because it depends on the specific tile and the specific product. Flooring Installation Sunrise Manor offers free estimates in Sunrise Manor. Call (855) 799-4650.
It matters for both, but in different ways. A floating click-lock floor needs the subfloor to be flat because the planks aren’t glued down; an out-of-tolerance floor will click, rock, and open at the seams over time. A glue-down floor needs the subfloor to be clean, sound, and within moisture tolerance because the adhesive is in direct contact with the substrate. The same subfloor might call for different correction depending on which system goes on it, which is why the floor selection and subfloor check happen together. Call (855) 799-4650 for a free estimate.
Yes, when the subfloor is checked properly at the estimate visit. The written estimate should state what kind of subfloor you have, whether it’s within tolerance for the chosen product, what correction (if any) is required, and what the plan is for height and transitions. If that information isn’t in the quote, ask for it before you sign. That’s what separates a documented estimate from a number that turns into a change order mid-project. Call (855) 799-4650 for an exact quote; estimates are free.
The Bottom Line
The subfloor is the part of your flooring project you’ll never see, and it’s the one that decides whether the floor above it lasts. In Sunrise Manor, that means understanding whether you’re on a concrete slab, a wood subfloor, or an existing tile floor, checking flatness to the product’s tolerance, testing a slab for moisture vapor emission before installing anything moisture-sensitive, and being honest about whether an existing tile floor is sound enough to build on. Get the measurements, the moisture reading, and the correction plan in writing before work starts. If you’re not sure what you’re approving, ask. Flooring Installation Sunrise Manor is a flooring-only specialist across Shaw, Mohawk, COREtec, Pergo, LifeProof, Mannington, Armstrong, Daltile, and Karndean, and we’ll help you get the subfloor right before the first board goes down. Call (855) 799-4650 to schedule your free estimate. We answer 24/7. Fast dispatch from 7am to 7pm, Sunday through Friday.
Written by the team at Flooring Installation Sunrise Manor.